> ## Documentation Index
> Fetch the complete documentation index at: https://help.aibuku.com/llms.txt
> Use this file to discover all available pages before exploring further.
# Set up your agency
> Tell Aibuku about your agency, then set up your first client.
## 1. Choose "For my clients"
When you sign up, the first screen asks **How will you use Aibuku?** Choose **For my clients**. This sets your account up as an agency, so you can add as many clients as you like.
## 2. Your agency
Next you see **Your agency**. If your agency has a website, type it under **Agency website**, tick **I own this site, or I have the right to use its content.**, and choose **Read my site**. When the read is done, choose **Continue**. Aibuku shows your agency's name and logo from the site: check them and choose **Looks good**.
No agency website? Choose **Skip, I don’t have an agency site**.
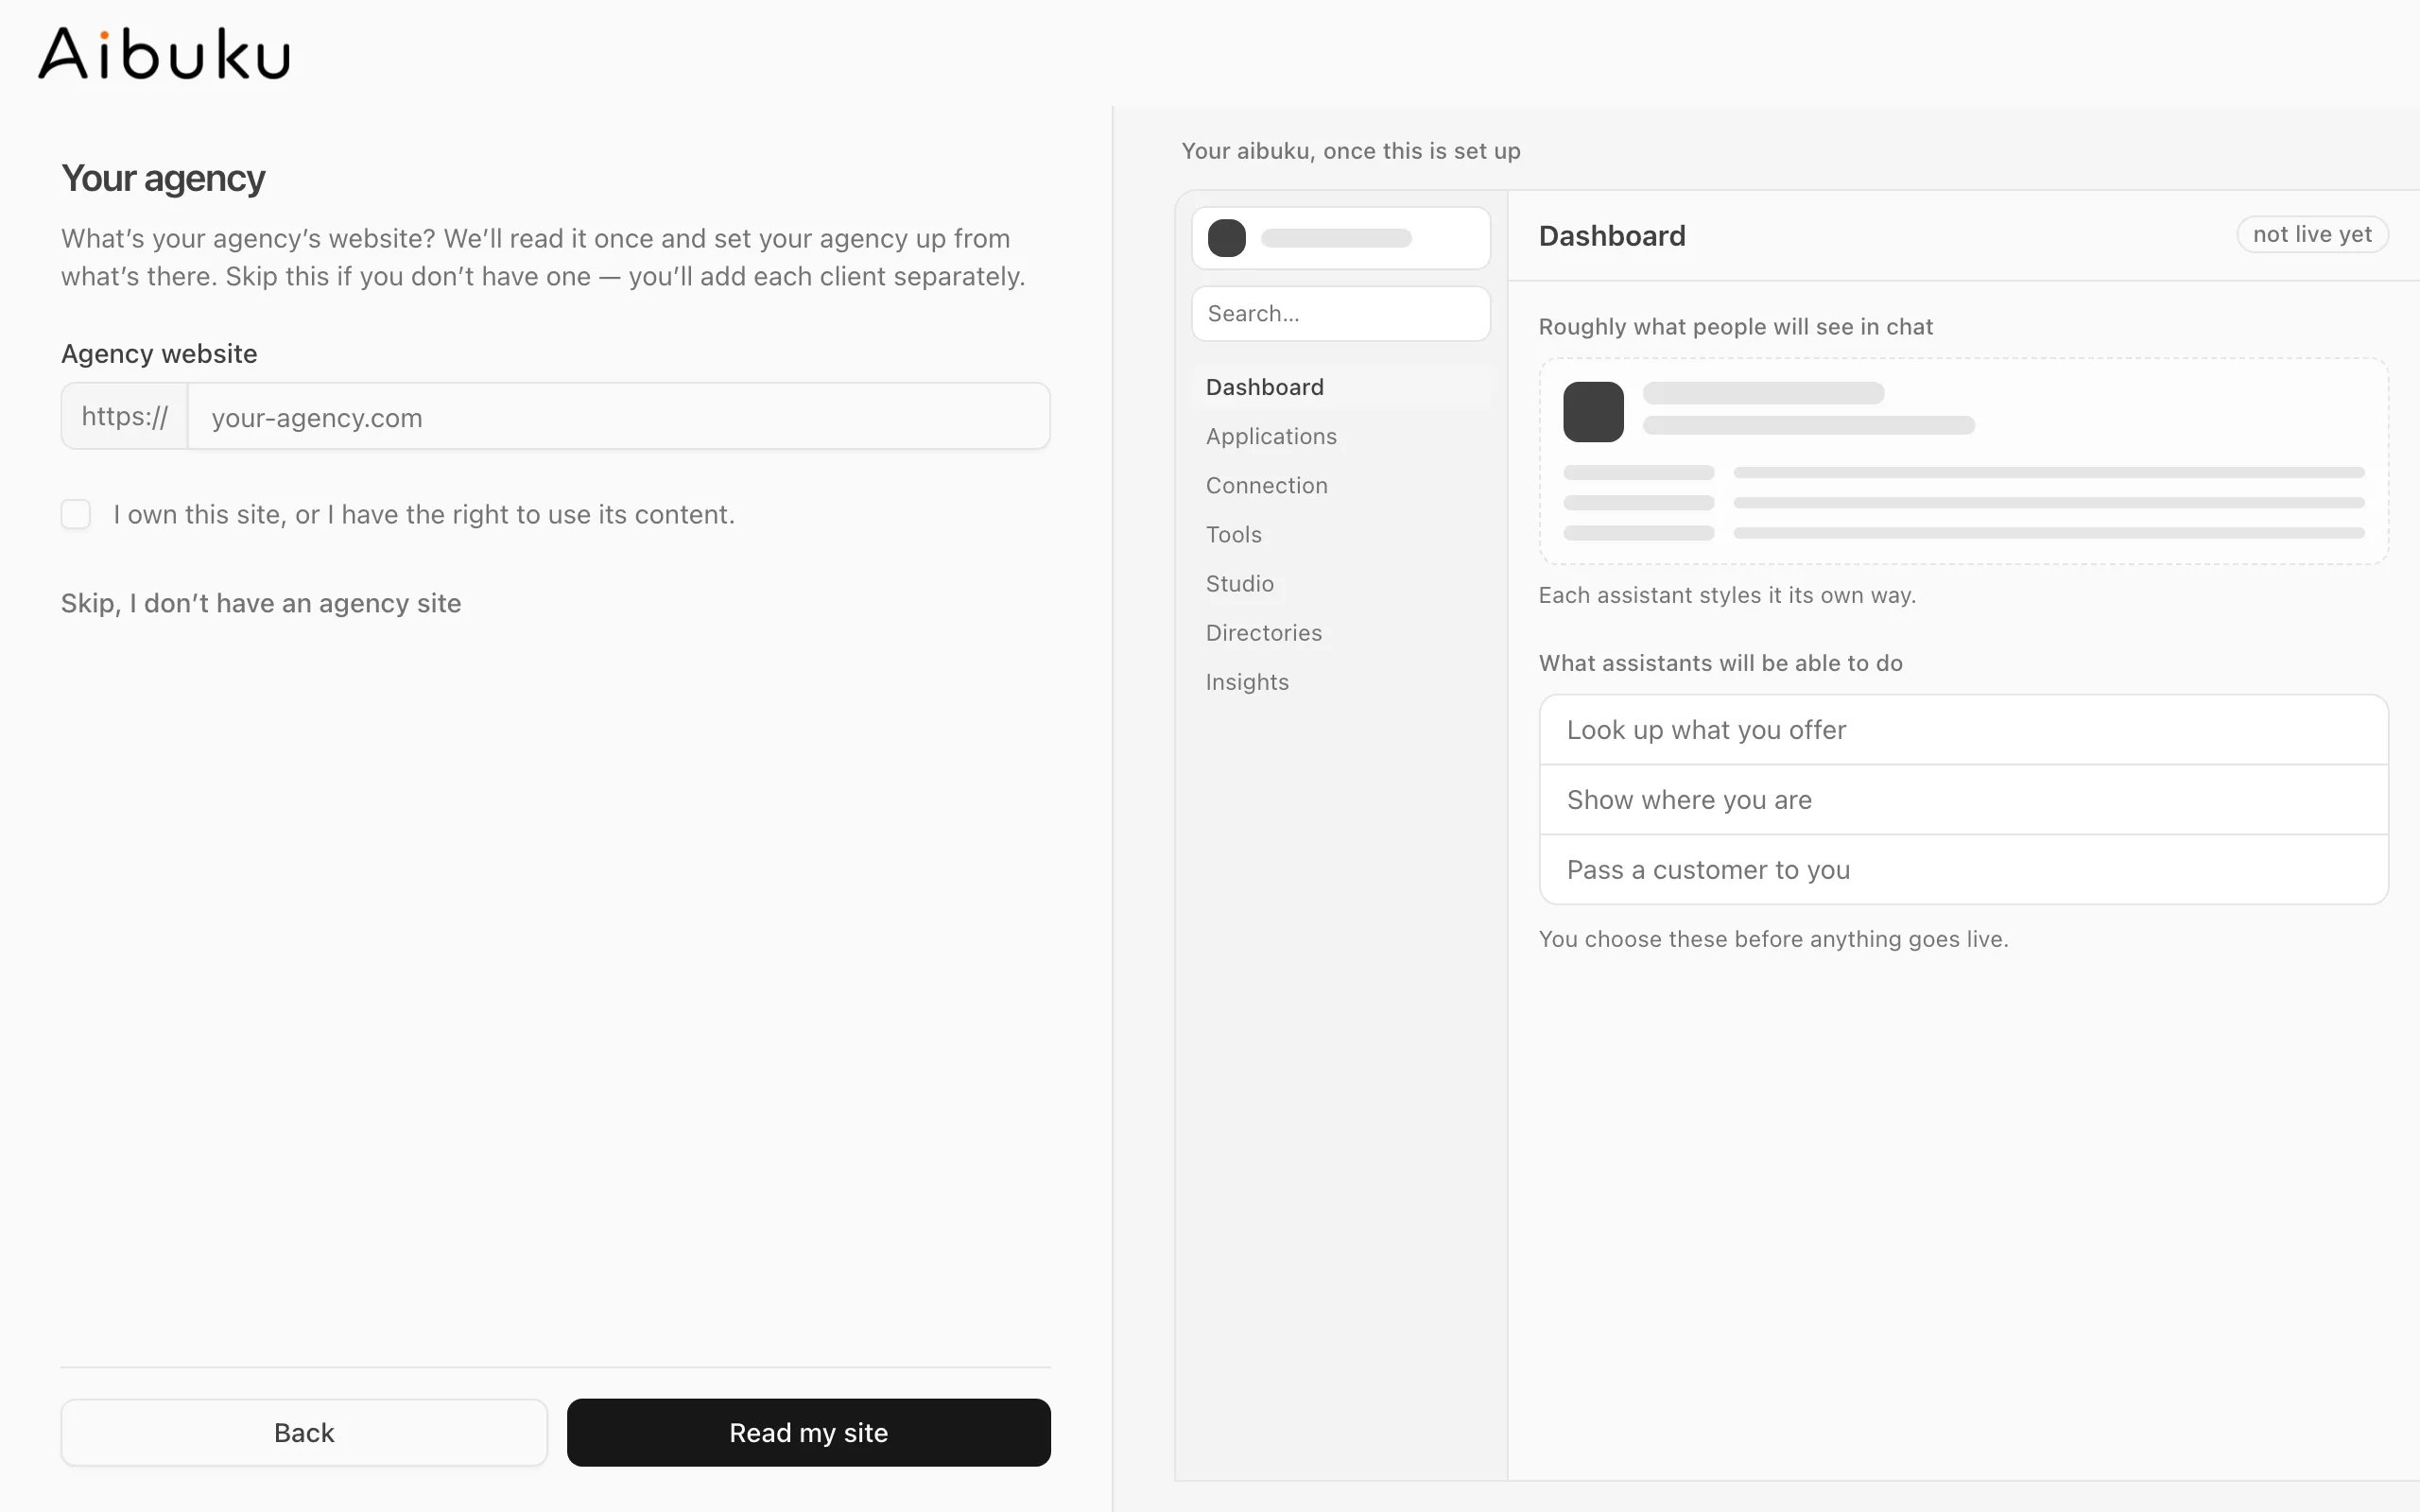 This step is about your agency, not a client. You set each client up separately, next.
## 3. Set up your first client
**Your agency is set up** — from here on, the work is per client. Under **Now set up your first client**, choose how to start:
This step is about your agency, not a client. You set each client up separately, next.
## 3. Set up your first client
**Your agency is set up** — from here on, the work is per client. Under **Now set up your first client**, choose how to start:
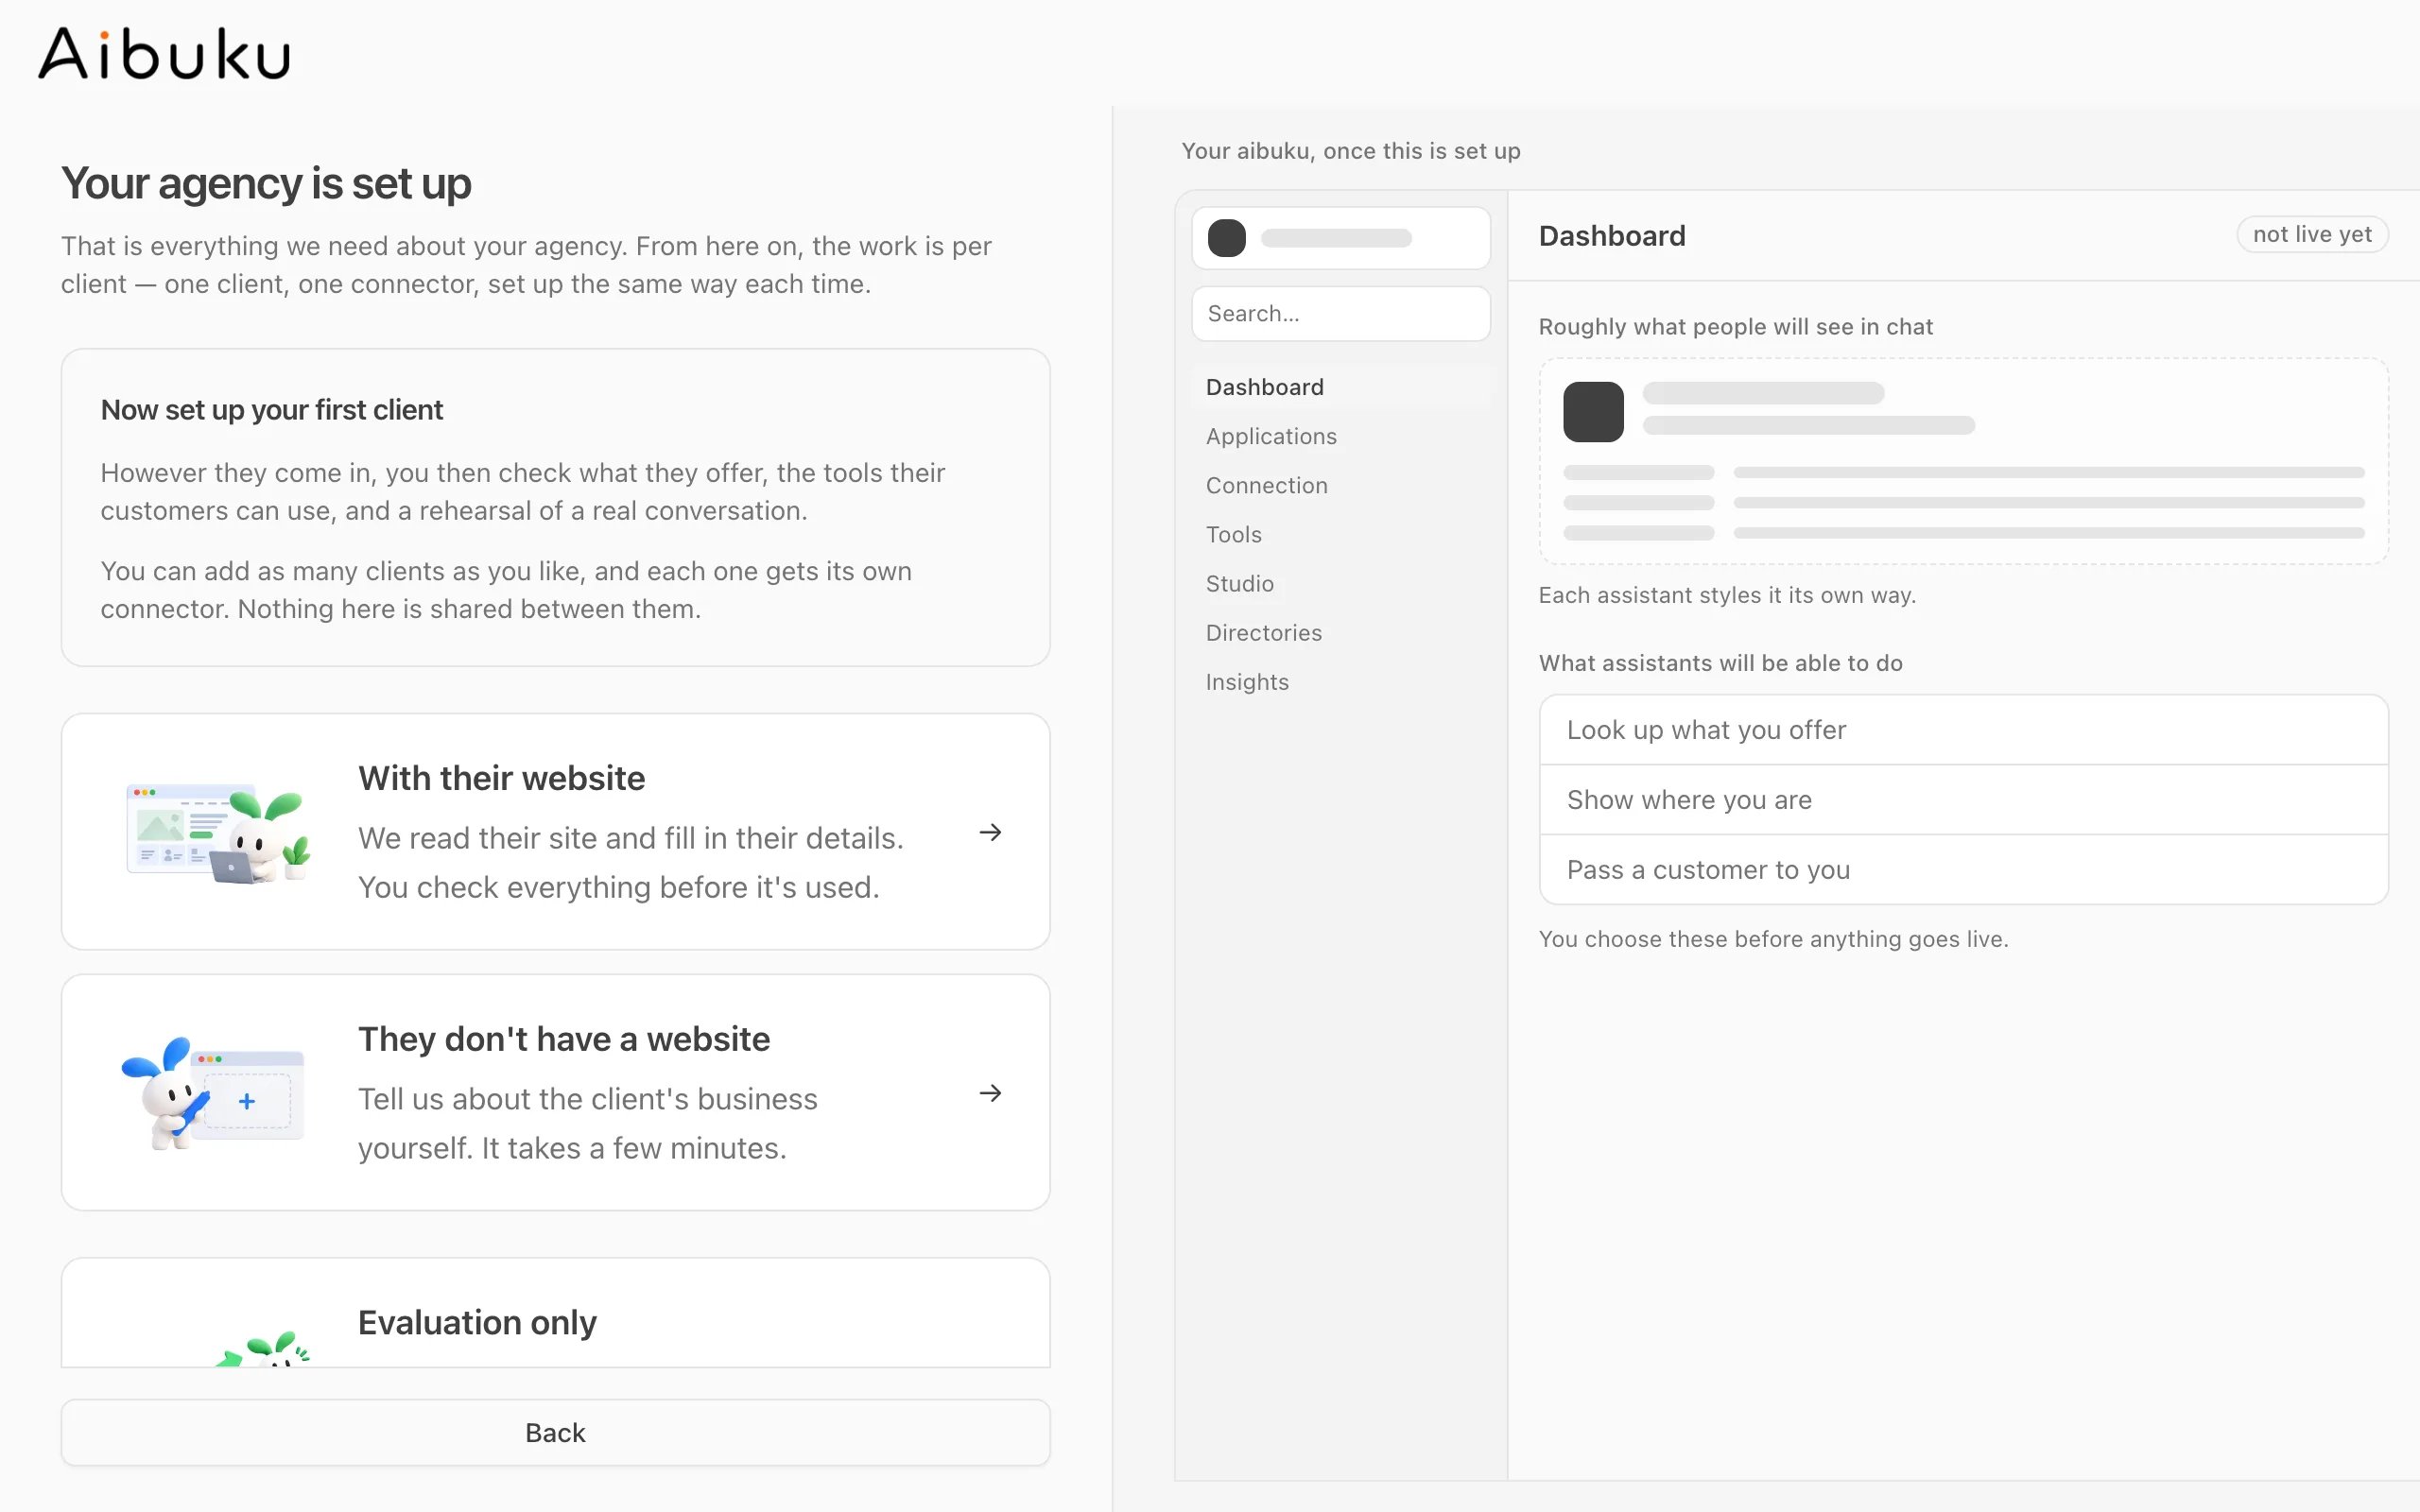 * **With their website** — Aibuku reads the client's site and fills in their details. You check everything before it is used.
* **They don't have a website** — you type the client's details in yourself.
* **Evaluation only** — you only measure how assistants answer about this client. Nothing is built for their customers.
The client's setup then follows the same steps as any business — see [Set up your business](/get-started/set-up-your-business). The screens speak about *the client*: **Client 1**, **Their website**, **Read their site**, **What they offer**, and **A rehearsal of what their customers see**, where you confirm with **Yes, that's them**.
## Your agency's name later
Your agency's name is the workspace name. To change it, open **Clients** (or **Workspace settings** in the menu at the top of the sidebar) and choose **Rename workspace**, then change **Workspace Name**. Each client keeps its own name.
This documentation is built and hosted on [Mintlify](https://mintlify.com), a developer documentation platform.
* **With their website** — Aibuku reads the client's site and fills in their details. You check everything before it is used.
* **They don't have a website** — you type the client's details in yourself.
* **Evaluation only** — you only measure how assistants answer about this client. Nothing is built for their customers.
The client's setup then follows the same steps as any business — see [Set up your business](/get-started/set-up-your-business). The screens speak about *the client*: **Client 1**, **Their website**, **Read their site**, **What they offer**, and **A rehearsal of what their customers see**, where you confirm with **Yes, that's them**.
## Your agency's name later
Your agency's name is the workspace name. To change it, open **Clients** (or **Workspace settings** in the menu at the top of the sidebar) and choose **Rename workspace**, then change **Workspace Name**. Each client keeps its own name.
This documentation is built and hosted on [Mintlify](https://mintlify.com), a developer documentation platform.